![]()
Polishing up the Rolls Royce Hudson from Gerry Anderson & Christopher Burr's Terrahawks
|
|||
| The name Hudson stands for the technical gobbledegook Heuristic Universal Driver with Sensory and Orbital Navigation, which means that it's a robot car able to drive itself, and also speaks with a posh voice! | |||
|
| Due to it's unexciting design I wasn't in any sort of
a hurry to build a replica of this motorcar, in fact I
don't think it was even on my list to build! This was also partly due to the fact that a friend of mine owns one of the original body shells, and so we always have an example to show at model displays. As a result the urge to create one was rather diminished even though I did rather like the idea of adding an example to my growing Terrahawk collection. Then out of the blue I got a casting of the vehicle courtesy of Canadian model maker Darren Peters, who generated it from his own original studio model. Past readers of Sci-Fi and Fantasy Models may remember Darren's article in issue 26 (Feb/March 1998) where he showed the process of making moulds of the car to create multiple castings, the idea being to create all the different coloured versions. So this 'How-to' article is going to be rather short as basically the one-piece model was provided to me complete and it was just a 5-minute job to clean it up and do a repaint............. well that's what I thought when I started. |
 |
 |
 |
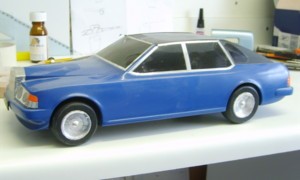
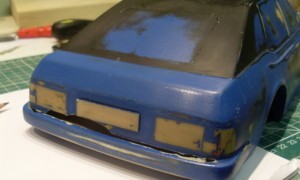
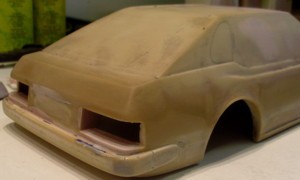
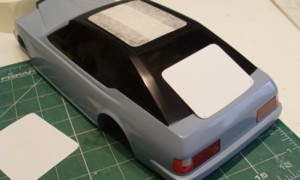
| Above: The model as provided in a rather nice blue
finish. There is talk in the magazine article about using
fibreglass cloth to form the multiple castings, but this
one seems to be only slush-moulded in resin as the rear
boot section had shattered just above the bumper. Also Darren talked about deliberately copying the parts (like hubcaps) as originally made, but they don't really match my behind the scene photographs. As the bottom of his example match's the model that is thrown off the cliff in the episode 'My Kingdom for a Zeaf' it is possible that he may have a slightly rougher stunt version. Also its possible that there was only one or two complete Hudson originals and that things like working headlights and chassis were moved to different coloured shells for each episode. (See photos in original Hudson) |
 |
 |
 |
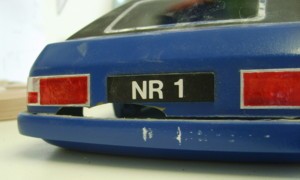
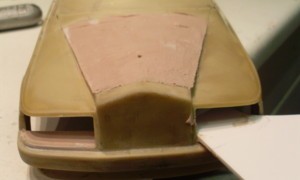
| The first job was to strip off the chassis plate and
all the trim, like foil detailing strips and number
plates. The rear plate was moulded into the body so it
had to be sanded off. The boot interior was sanded clean,
and the surface roughed up, allowing me to add filler and
reform the backend and bumper. With the cracks now fixed
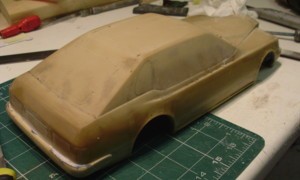
I could proceed to remove all the paint and get down to
the bare casting. I thought I could do this with simple
wet & dry paper but the paint was tougher than I
thought, so a friend suggested using motorcar brake
fluid. I had never used that before for removing paint
but I knew that it worked as it had removed the paint
from my nice new tools when I was working on my Datsun
repairs! So I put the model in a plastic tray and started to soak it in the liquid. This is pretty powerful and unpleasant stuff so has to be handled with care, and thick rubber gloves, but it did work. Some of the paint came off easily but other parts didn't want to move at all, so I had to help the liquid along by rubbing it into the model's surface with the aid of wire wool. This did finally shift it all and after a good rinse I had a naked resin casting. |
 |
 |
 |
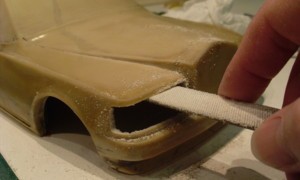
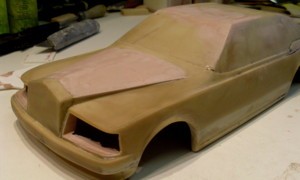
| My simple plan had been to add lights and just
repaint the casting, however several faults had made
themselves apparent to me. Firstly the bonnet was clearly
deformed and was bowing inwards, so this had to be
straightened. I started by adding small bits of filler
but ended up reshaping the entire area and sharpening up
the edges. Then I noticed that the roof at the front was
also deforming inwards, especially on the left side and
into the top of the windscreen area. So all of that
needed to be re-sculpted again in filler. The car filler
I use these days is called U-Pol Easy 1, which is a lot
smoother than the old P38 stuff I used years ago. I had to be very careful as I sanded the model with wet & dry paper, as I obviously didn't want to loose the original contours of this casting. But I did need to keep working on the finish as I had spotted a number of deformed areas, especially on the side windows. These all needed fixing as the windows were to be finished with a high gloss black and would be reflecting light, so any blemish would be clearly visible. The casting had come to me with all the various light-units simply painted on, or suggested with reflective tapes. However I wanted to follow the original look by using clear parts, so the next step was heat up some small pieces of transparent Plasticard and pull them over the corner sections to create my light covers. These mouldings could then be safely put to one side and I could proceed to drill out the head and tail light areas. The resin was very nice and easy to work with and could be filed smoothly. To give the areas more depth I placed pieces of Plasticard into the openings and added small amounts of filler to the inside. When the filler had set I could remove the plastic and trim off any excess material. |
 |
 |
 |
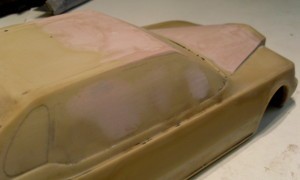
| The casting was now sprayed with several coats of
filler primer and sanded smooth, then sprayed with
standard primer and again sanded with very fine wet &
dry paper. At this stage I ran into a problem of my own
making when I decided to use Gold paint! Hudson is a car
that can change colour so in effect you can paint it any
colour that you like, and as I was using profile
photographs of a nice gold version I had decided to make
mine that colour too. The first paint that I used was the
wrong shade so I had to trawl around several shops
looking for what I thought was the correct gold. Then I
proceeded to paint the bodyshell again only to realise
that the model looked ......... boring! The fact is
that Hudson is not exactly a stunningly imaginative
Sci-Fi design, apparently Rolls Royce had the final say
on the styling and didn't want something that looked
silly in their eyes. As I applied the gold I realised
that it simply made it look like a rather plain motorcar,
and not something that was 'unusual'. The only colour
that did make the vehicle look a bit different was
Hudson's original greyish non-colour, so back to the shop
to hunt for another can of paint. |
 |
 |
 |
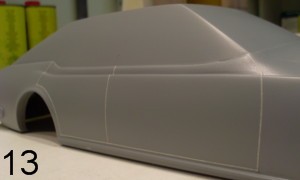
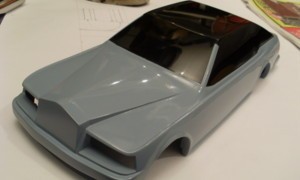
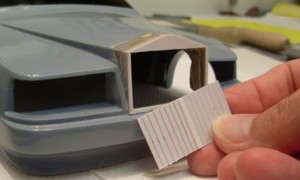
| This colour went on just fine, and after it had set I
could gently T-cut it to a slightly glossier finish.
During this painting process very thin lines of masking
tape were temporarily applied to the sides to create the
outlines of the doors (pic 13), and removed after the
final coat was applied. Next the cabin area was masked
off and painted with black primer and gloss coats.
Unfortunately more defects in the surface now appeared,
especially on the rear window section, so these had to be
fixed and repainted. Then the process repeated again when
more little bits showed up, and again when more flaws
appeared. It was a very frustrating time - As with
Stingray I'm not a fan of smooth clean models as they are
a right pain to build, with every minor mark and blemish
needing to be fixed! At this stage I was thinking about
the lights and did put some thought into making them
actually work, but I decided against it, as it would not
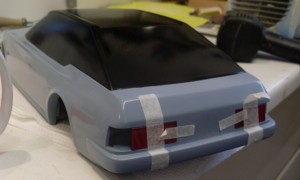
really be worth the effort. So I began adding the rear
light units; and carefully trimmed the previously moulded
transparent parts to fit the openings I had made. However
as I was about to glue them into place I finally listened
to that little voice in my head that had been
subconsciously telling me that something was wrong, and
after a few calculations I realised that the lights were
too small. Flaming Thunderbolts!!! To colour the clear parts I sprayed the big lights with red paint on the inside. The white sidelights were also sprayed internally with a light coat of white primer, while all the small orange and red sections were done using adhesive Lens repair films bought from the auto repair shop. |
 |
 |
 |
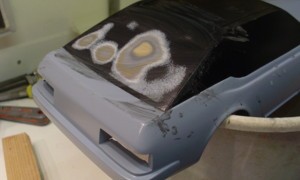
| With the black paint now fully dry I T-Cut it for a
glossier finish, then again the next day to buff it to a
high gloss reflective finish. This paint would now
represent my windows, so the next job was to carefully
mask off all the various window sections and spray over
with several coats of matt black paint to represent the
roof covering. To aid in creating the masking I cut the
window shapes out in thin Plasticard, trimmed them to get
the perfect shapes and then used them as templates to cut
out the masking tape. Afterwards the sunroof panel was sprayed over with a clear lacquer and T-Cut slightly, to just dull it down a little as I didn't want it to be as clear as the windows. The
front lights and radiator grill were the next problems to
sort, with the radiator being the biggest puzzle. The
front of the radiator on this casting was just a plain
smooth piece, although it had distorted and lost its true
shape so I sanded it completely flat and then added some
thin plastic sheeting to reform the front facing. When I
got the casting the radiator grill had just been
simulated with various strips of reflective tape, a
simple technique that seemed to have been used on some of
the original models, but the hero version had featured a
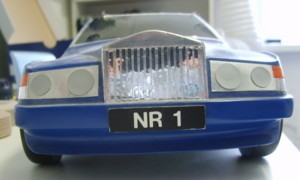
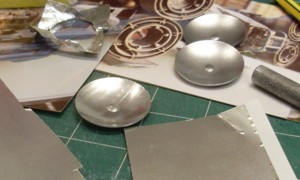
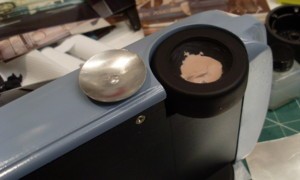
properly formed grill. The main front lights also posed a bit of a problem, as I needed something to actually represent them. The design has a twin bulb design with the one on the outside being smaller. I considered painting some shallow plastic domes silver, but that would not have looked too convincing. Then I thought of using actual bulbs, but in the end I found some 'self-adhesive eyes' at Hobbycraft that are used for sticking on toys or cards. The eyes come in different sizes and are plastic hemispheres with a loose black disc inside to represent the iris. All I had to do was cut off the seal on the back, remove the disc and then rub the insides with fine wet & dry paper to frost them up. These 'bulbs' were then glued to a silver foil backing and I could then fit the final transparent plastic lens mouldings. These were also rubbed over, on the inside, to frost them up and then had vertical lines scored across them. |
 |
 |
 |
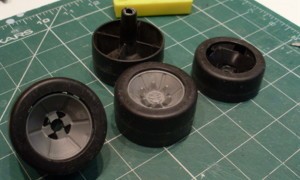
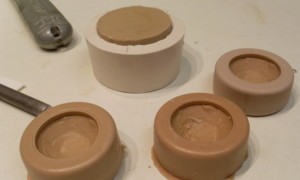
| The wheels were the next problem, and here I had help
from my friend Bob Bailey who came up with some very
similar looking plastic versions that had been removed
from a Batmobile toy car. The wheels were too deep so I
had to remove a section from the back to thin them down,
and then also put a plastic ring in the centre to
compensate for the hubcap space being fractionally too
large. The hubcaps themselves were heat-moulded in
Plasticard and trimmed to fit, with a small kit part to
form the centres. However as I was about to fit these wheels I realised that they weren't quite good enough, because the inside edge was square-cut and the backs were hollow. This was not a problem if the car was mounted on a display plinth, as I had originally planned, but as mine was now going to be picked up and photographed from quite low down these faults would be easily spotted, so back to the Hobbycraft store for some silicone rubber. One wheel was quickly moulded in rubber and then I proceeded to cast up four solid wheels using a sloppy carfiller/resin mix. Later the sharp inside edges could be sanded to a rounder shape to match the front. Then they were then painted, drilled, and securely fixed to the axles - so they don't revolve. At this stage I finally had to decide just how I was going to tackle the problem of the chrome! Chrome is always a problem with the so-called chrome paints usually having just a useless silver finish. My first idea to tackle this was to buy some Bare-Metal foil, a product that I had never used before but sounded like it could do the job. The foil looked pretty good and worked well on the flat radiator, but then turned into a mess when I applied it to the concave wheel hubcaps. So my fall back option was to buy a paint that a fellow modeller had talked about called Alcad Chrome. This comes in a small glass container and you apply it, using an airbrush, after first spraying all your parts gloss black. So I prepared all the parts that needed the treatment and began with high hopes... unfortunately the results were not brilliant. I'm not sure if it was just me (probably was) but I struggled to get a perfect finish, and even worse days later when I touched the paint surface parts of it marked up even worse, as if tiny bits of paint had not dried properly? |
 |
 |
 |
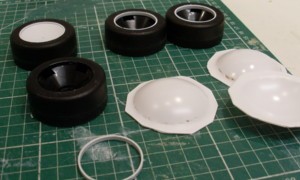
| As I wanted the model on public display in a few days
time I needed to make something work, and quickly, so I
went back to the foil and tried again. This time I cut a
slit in the Bare-Metal foil, and then carefully and
slowly applied it in a circular fashion whilst rotating
the hubcaps. This time it worked just fine apart from the
minor blemish where the cut edges finally overlapped.
However with a bit of practice, and by cutting a small
wedge-shaped section out of the foil, the overlap could
be minimised and almost lost. Then finally setting the
hubcaps with this join line in a horizontal position also
helps to loose it, thanks to the way the concave shape
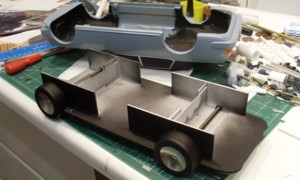
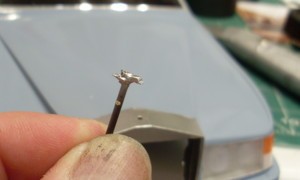
reflects surrounding light. A slight problem arose when I tried to glue the finished hubcaps into the wheels, as I pushed the parts in slightly too deep and could not get them out! As a result I had to drill small holes in the back of each wheel so that a metal rod could be inserted to help position the hubcaps. The radiator itself ended up as a mixture of Alclad paint and Bare-Metal foil. The Silver Lady on the top of the radiator was fashioned from Brass rod, the end being bent and filed, with added solder to create the wings. The chassis plate was now fitted with several blank sections of Plasticard, which were sprayed matt black, the sole function of these was to prevent anyone from looking past the wheels and right through to the other side of the model. Final details included the various bits of silver
trim, which I cut from self-adhesive metal tape. These
tapes are sold in car shops and often used for wrapping
rusting exhaust pipes. To cut the tape I used a metal
rule and several new knife blades to make sure that the
cutting edge was as sharp as possible. To get a clean cut
edge its best to hold the blade at the shallowest angle
possible. |
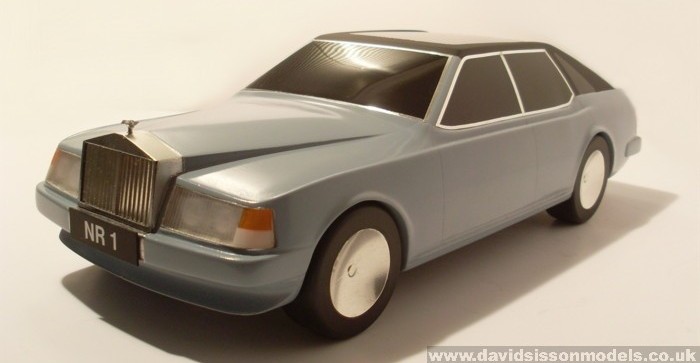 |
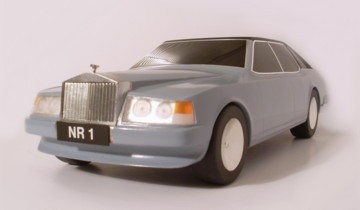
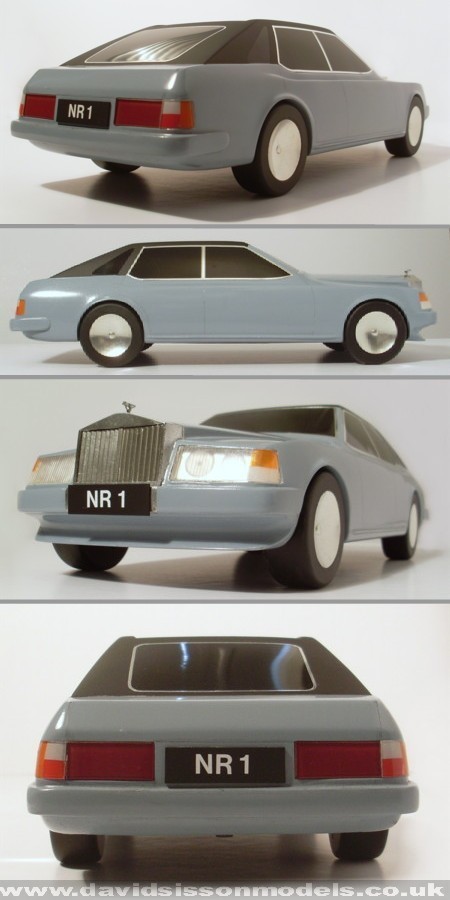
Finally I added some minor weathering, and drew in the lines for the boot and then highlighted the door edges. However at the end of the day Hudson is a pretty clean car and I couldn't dirty it that much. This does tend to make it look a little toy-like, but that's also down to it's rather small size. At only around 13&1/2 inches long by 5&1/2 wide it's probably the smallest model I've built in years. |
| Article and photographs copyright David Sisson 2013 |