![]()
Building the Lunar Module from Gerry Anderson's U F O
|
|||
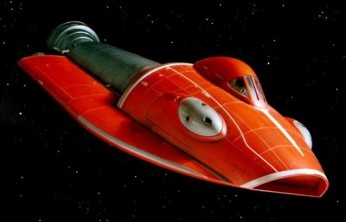
| While those amazing craft grab most peoples attention there are a number of other striking designs in the series and one of the oddest was the Lunar Module. This strange vehicle, designed for atmospheric re-entry was the principle transport craft that took personnel to the secret Moonbase - SHADO's first line of defence. | |||
 |
|||
 |
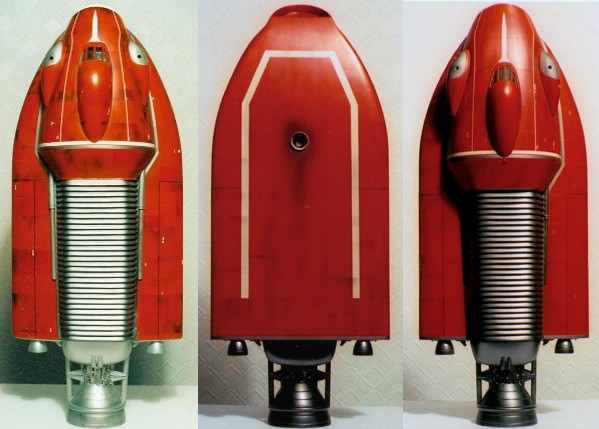
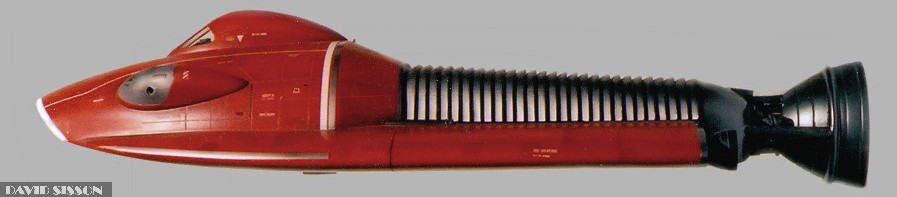
I've wanted a replica of this model for some time but I could never decide which version to build. The problem was that in order to film the variety of special effects needed for the show there were various models of the main craft built to different scales. Small models for long distance shots, large models for close-ups. While these different models are supposed to look the same as each other in reality there will always be differences - usually quite a few for the more eagle-eyed viewer to spot but normally small in nature. With this craft the modelmakers really ended up creating almost two completely different looking craft which gives people like me (us) a problem. My favourite SFX shots of the Lunar Module are from the episode 'Conflict' where the craft re-enters the Earth's atmosphere at a steeper angle than normal and gets battered by the very high temperatures. This was done with the big model so as a result thats my favourite version. However all of the available profile photographs are of the small version - and as I was also asked to build that one by friends - its the one that I found myself building. Nine years and five small versions later I got fed up with looking at this design, altered my moulds and built the big version. So this article will feature photographs of both. |
The Build ......by David Sisson
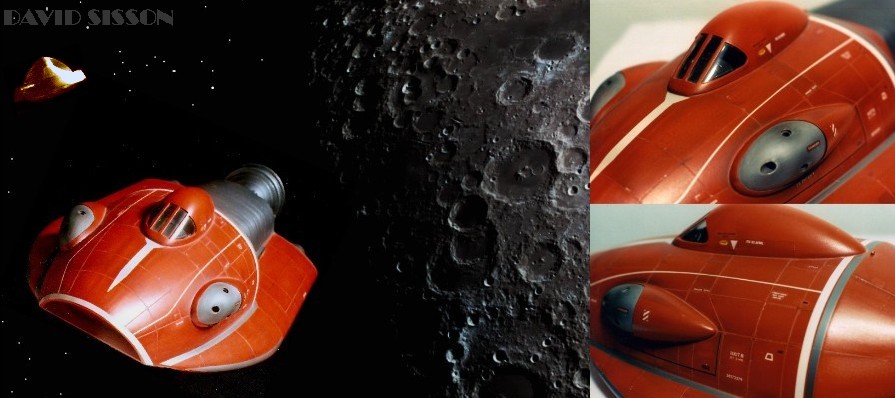
I began by forming the basic shape of the craft out of 1/2 inch balsawood sheets. At this early stage I wasn't too sure of which version to build which is why the model is in pieces. Overall the two versions have the same length but the larger one has a bigger front end and a shorter ribbed centre section. The ribbed area was formed in wood here but that was just to give me an idea of its shape and position. With the shape set the wooden parts were fixed back together and the ribbed area removed. The soft wood is coated in two layers of SP113 epoxy resin and sanded smooth with wet & dry paper. The cabin and side blisters were also made from the same materials. Plaster moulds were taken of this master in order to make fibreglass castings. With plaster moulds there cannot be any undercuts so the split line runs along the widest points which is marked by the line in the photo above. Due to its strange shape I only ended up making three partial fibreglass casts - with a few areas missing! The reason for this was due to me wanting to alter the angle of the nose slightly (you don't always have to worry over getting the master pattern 'perfect' as you can usually adjust the fitting of the final parts) and also worries over the flat bottom actually being flat - as such things can often distort in the casting process. So to fix everything together and create the missing bottom area I had to draw the outline of the craft onto some cheap furniture board (plastic-coated chipboard) that was then waxed with furniture polish. Then the fibreglass nose section was lightly superglued into position with a support under the front end to hold it at the right height. The two side pieces were then glued into their respective positions and a length of Plasticard glued across the rear. Now I could just apply resin and glassfibre matting into the hole in the centre, brushing it all around the joins and along the rear plastic bulkhead. Electrical tape is run over the joins to stop the resin leaking out during the process - it has been removed in these photos. The new fibreglass mixture is left to set - then the wooden board is gently flexed - and the model just pop's off the surface! By doing it in this way it ensures that the bottom of the model is really level and it gives me the chance to adjust the dimensions of the finished model with ease. All models usually have a part that is a problem to make, with this model it was the ribbed area. How the original models were built is unknown but a friend made one using a series of individually shaped perspex sheets - a bit like a loaf of sliced bread with each rib being a slice. With around 30 ribs that was a lot of perspex to shape and the final result had actually twisted. So I made mine from a series of thinner Plasticard sheets, spaced out with strips of plastic between each one. More plastic made the flat areas of the rib while filler was used to create the round parts. The whole thing was securely glued to a piece of wood to prevent any distortion. This was then moulded and the final part cast in a mixture of resin and filler. However the first one was a bit too angular and for my subsequent models I made a new casting in just car filler that I could reshape to a much rounder appearance, and then used that as my new master. The ribbed part is glued to the model and then the area between it and the front section could be made. I was going to cast this part but it seemed easier to just make it in filler at this stage. The rest of the model has been sprayed with filler primer and rubbed down with wet & dry paper. I should point out that this process can take a while, involving many coats and the model should be perfectly smooth when you've finished. The cabin and thruster blisters were now heat formed from 0.75 and 1mm Plasticard. The blisters required two layers to create the recessed area, this part was drilled and small conical kit parts added to the inside to create the thrusters. The cabin also required two layers with a partial inner transparent moulding for the windows. On the live action set there were no windows on show but the model looks much better for having clear windows and a detailed interior - with pilots made from modified 1/35 scale soldiers. The wooden master had a flat nose so the recessed area had to be drilled out and a plastic bulkhead glued into position The engine section was next. After spending an hour looking through my 'spares and bits box' for something that could be used for the engine bell I gave up and made it completely from scratch. To do this the outline shape of the bell (slightly larger than required) was cut out of a sheet of thick Plasticard. This was then turned over some wet plaster of Paris to form the basic shape. When the plaster had set I heated some 1.5 mm Plasticard and pulled it over this shape to give me a quick mould. P38 car filler was mixed with resin and smeared around the inside of this to create a copy of the plaster former. This copy was just as rough as the plaster version but it gave me a good stable surface to work on, adding more filler and sanding it all to the required shape. When I was satisfied with this I could finally take a plaster mould and cast up the finished piece from a thin layer of P38. The engine base was a bit easier just being carved from balsa wood, then cast again in a resin/filler mix. The connecting tube shapes between the parts were made from either wood or brass tubes. The circular bulge around the engine bell was formed entirely out of filler, slowly adding bits to build up the shape. The grooving around the bell was achieved by rotating the part against a hacksaw blade and file. This section was then covered in assorted kit parts for detailing. The model was painted
using cellulose motor car spray paints and weathered with
mostly black enamel paint. The odd thing about the Lunar
Module is that the dirt is mostly absent from the panel
lines which actually then appear clean. To achieve this
thin tapes were run over the model and then it was
covered in black paint from an airbrush. The tapes were
removed and the black reduced by wiping over with a rag
with just a trace of enamel thinners on it, and more
gently with wire wool. |
|
|