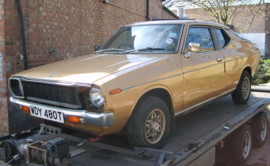
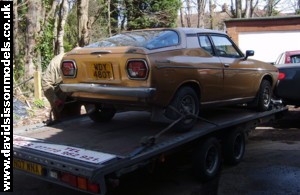
June 12th 2008
I decided to start work on the inside of the car,
although I had been tinkering with bits I now decided to
go the whole hog and strip the interior fittings so that
I could examine the floor for any rust - and remove all
the filth in the process!
I started at the back and removed the three black plastic
sections that line the boot space. These fragile
mouldings had split in several places so again I got my
modelling glues out to fix them and stuck strips of
plastic sheeting on the back to strengthen the new joins.
Water must have been leaking into the back as there was a
fair amount of surface rust in this area that all needed
sanding away. Then the area was cleaned up and painted a
nice bright silver.June
19th 2008
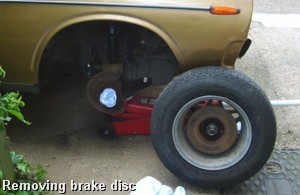
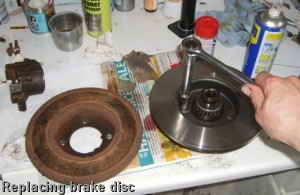
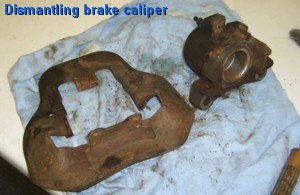
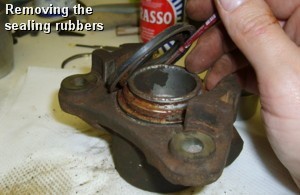
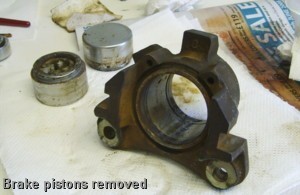
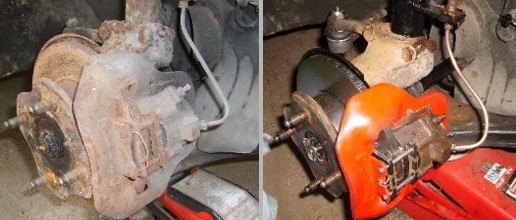
Back to the brakes again as it was time to tackle
the rear wheels and surprise surprise one of the brake
pipe nuts actually came off without a fight - I almost
expected a fanfare and dancing girls to appear to
celebrate!
Again the wheel hub did not want to come off - I had to
use the hammer again. There was a big build up of surface
rust on the main parts that all needed removing and a lot
of muck on the inside. New wheel cylinders and pads were
fitted and the existing securing clips were just sanded
clean and painted. The brake pipes themselves were
cleaned up with wet & dry paper and painted red, as
was the hub.
As I was working partly under the car I also started to
clean parts of the underneath and the wheel arch with a
wirebrush and apply a new coating of underseal - of
course a fair bit of it ended up in my hair too. Its a
dirty job this.
June 21st 2008
Back to the interior and time to remove the seats
and carpets. The seats are actually in a very good
condition but the carpets are dreadful.
So far I've only found a lot of peanuts, 2 pens and a few
foreign coins - I was hoping for a stash of old £50
notes!
June 25th 2008
Work starts on the second (and last) rear wheel.
The brake nut does not want to come off this time.
July 12 2008
Its been raining rather a
lot so work on the car has slowed. Still today the rain
held off (mostly) so I could tackle a few more jobs. I
decided to do some more work on the inside and removed
the last bit of the rear seat, uncovering more muck and
some water.
I also removed the black trim panels to examine the
condition of the bodywork interior. More water was found
and rust to go with it, this is obviously getting in from
the windows above and just dripping slowly down through
the bodywork. There are openings to let this water pass
through but if it hangs about for long then it will start
to rust the metal. I will need to rub the area down and
plan to apply underseal to the insides of most of the
panels and doors to protect the metal surfaces.
I will also need the panels off
to change the paint colour, but the main reason for
removing the trim today was to look at the inside of the
drivers door as the lock doesn't work from the outside.
So far I have been having to enter the passenger side and
lock the drivers door from the inside, so I thought it
was about time I tried to repair the lock.
I unscrewed the window winder handle, the plastic lock
surround and the interior door handle and was about to
carefully detach the black trim when it fell off! Yes I
have found another of 'Mr Bodge Its' previous DIY jobs.
All but one of the plastic support catches have been
broken and the trim was completely loose. A plastic bag
was taped across the inside of the door and the lock
securing bracket was bent - so he had obviously had
problems with the lock before.
I removed the bracket and bent it back into shape and
then removed the lock and oiled it. After a bit of
testing I tried reassembling all the parts a few times
until I managed to get it all working again - success!
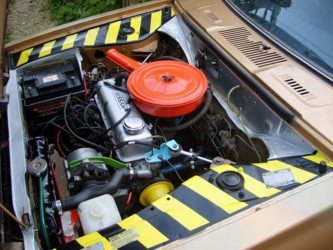
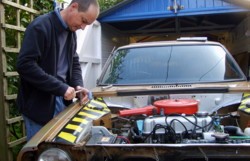
To top off the day I fired up
the engine and went for a drive............only to the
front gates which are about 30 feet away, but it was
still my first trip!
July 13th 2008
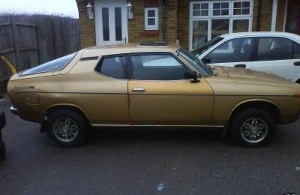
The Sun was shining today so I got in a full days
work on the car, as it was warm I decided to do some
painting and began work on the rear hatch. I was only
going to rub down some of the rough areas, and then put
on a dab of paint to protect them, but ended up doing the
whole panel. You might notice that I'm not painting it
Gold but a rather a bright Blue, I'm not totally sure
about the colour yet as it does seem slightly OTT.
Also I got out my car filler and repaired a couple of
dents in the rear panel, I also found a couple of dents
on the corners which I hammered out partly and then
filled.
After its short trip yesterday I found some oil on the
ground which I think is from the gearbox - I need to
remove the primary gear again and put some sealant on the
joint.
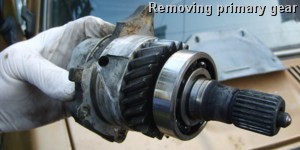
July 20th 2008
Removed the Primary gear and
put sealant on the part and that seems to have fixed the
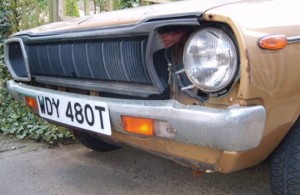
problem. Then I removed the front headlights to see why
one wasn't working. There was the usual rusty bits and
screws that didn't want to come out but the securing
metal rims around the lights had also been jammed back on
wrongly and bent - so all the parts needed cleaning and
fixing. Luckily this car has separate bulbs that fit into
the glass, and aren't sealed beam units like my last one,
so the problem was just traced to simply needing a new
bulb. I went off to an Autojumble to get one but found a
whole new lamp instead which was nice as one of mine was
very coroded.
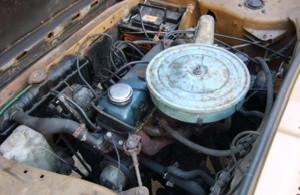
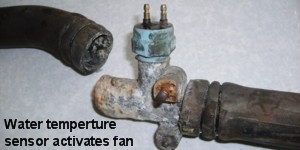
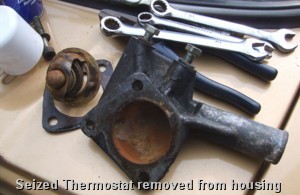
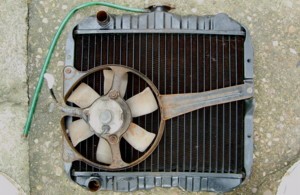
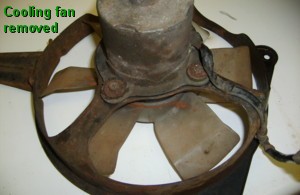
I've noticed that my cooling fan has never operated so
today I shorted the circuit to make sure that the fan
actually works and it did. The thermostat switch is
probably defective but I'm planning to install a manual
overide switch anyway so thats no great problem.
July 22th 2008
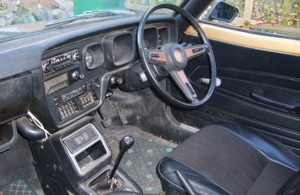
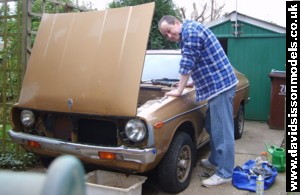
I removed the hatch today
and painted the surrounding area. I also started painting
the inside of the car as I'm going for an all-black
interior. Also refitted the bumpers to see what they
looked like.
July 27th 2008
Today I finally bled the
brakes and an awful lot of air came out, still think that
I'll have to do it again. Also bought a small roll of
black carpet and used the old carpets as templates to cut
out my new ones, now I've just got to start sewing all
the edges up.
Aug 1st 2008
I'm getting a bit fed up
with working on my car only to come out the next day to
find it wet and rusting even more - and covered in bird
muck! So time for a slight hold up on the restoration as
I really need to rebuild my garage to store it in.
|