![]()
Restoring the Original 44" Eagle 1 Studio SFX Model ........ from the Gerry Anderson television series Space:1999
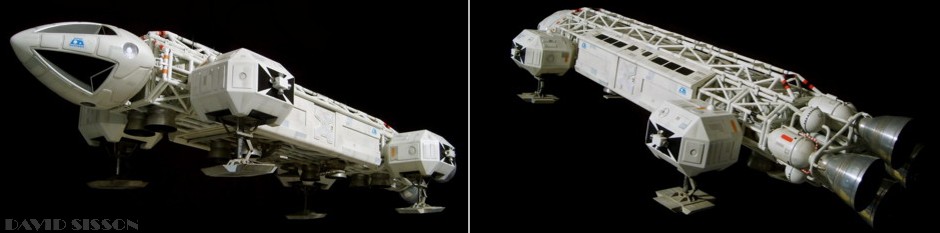
| Back to Eagle Selection Page | Rewrite by David Sisson (Original full article appears here at Smallartworks) | To Eagle One Recently |
|
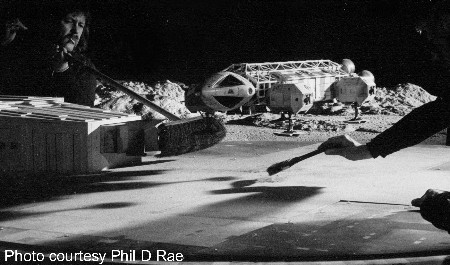
In 2002 I reached the grand old age of 40 and I
got a fantastic present, something I had wanted for 27
years, the big 44-inch Eagle One studio model from my
favourite science fiction television series SPACE: 1999. |
Although I had seen Eagle One many times over the years I had not realised how much the model had deteriorated and although it was virtually complete the parts weren't exactly in good condition or securely fixed together. In fact on first examination I thought the model was going to fall apart in my hands; which was due mostly to the connections in the main (spine) frame being broken or missing. The engine section felt like it was hanging off, the nosecone wasn't properly secured and the panels on the four shoulder pods were detaching. Over the years this model has been damaged and repaired on numerous occasions with most of these repairs being quick-fix's using a variety of glues. However it had now reached a point where such measures were next to useless and more extreme action was necessary such as a complete strip down and rebuild. .At first I didn't want to do this as it can be seen to be damaging the authenticity of the model, the whole point of having an original prop is that it is original and not something that you have made. However in this case the model was not in 'studio filmed condition', it had been through many peoples hands and had been fiddled with over the years. The overall white paintwork was not original, neither were the red bands on the Passenger Pod, the grey panels, the weathering, the coloured bands, the black window panels on the Beak and all the Alpha decals - which were just new reproductions that were peeling off. So I would not really be loosing anything original and could only improve it. Plus I also hate to see sad old-looking broken models. |
|
 |
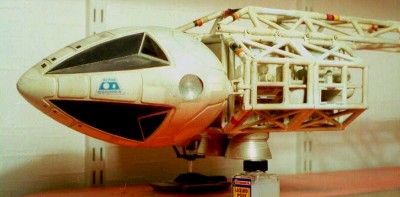
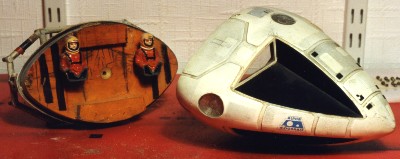
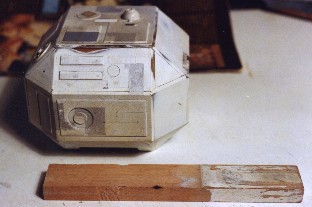
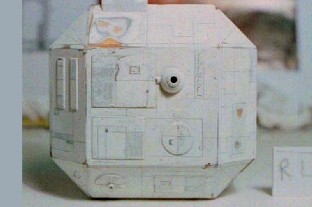
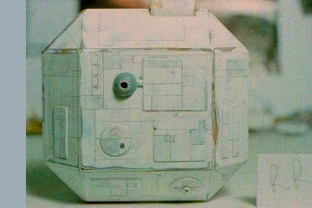
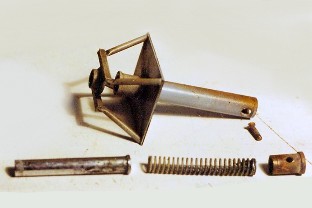
The
Nosecone (Beak) comes in two halves and is held together
by small screws that slot into the two wooden blocks
between the pilot figures. |
 |
Sometime in the past the nosecone had been damaged quite badly and then repaired. An impact to the tip had split the front section almost in half and a large lump of glue had been stuck inside to hold it all together. |
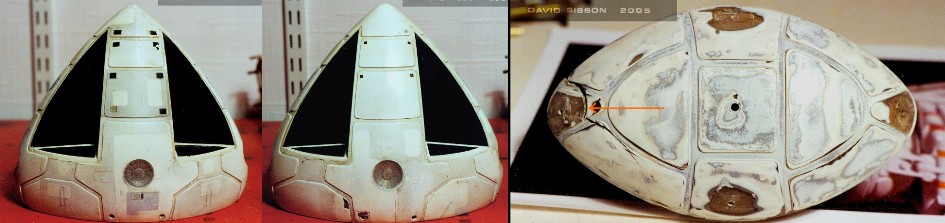 |
The rear half had also been split on the left hand side and this had also broken the collar framework that connects it to the mainframe. Whoever had carried out the previous repair had fixed the collar before attaching it to the back of the Beak but a correct fit was prevented by the small angled locating pins, as a result filler had been applied to the areas to hide the problem. I needed to strip down the parts and break the collar apart so that it could be reassembled in the correct position. |
 |
Right; Note the two vertical pipes have flat areas at the centre to allow a closer fit to the rear bulkhead. |
 |
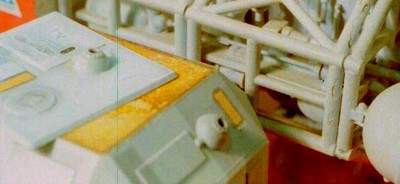
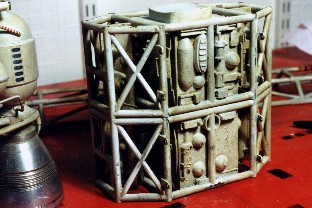
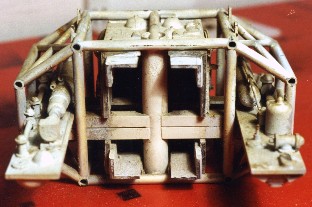
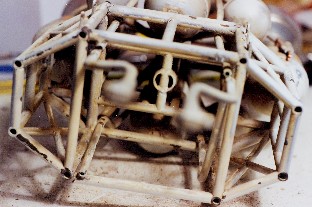
The top Spine is disconnected from the two central framework sections by removing 16 small bolts. The metal frame sections actually comprise of two separate pieces that are just held together by the bolts and the internal plastic parts.The two detailed trays are just glued to the top of the shoulder pod supports and these front ones came out easily. |
 |
 |
 |
 |
 |
 |
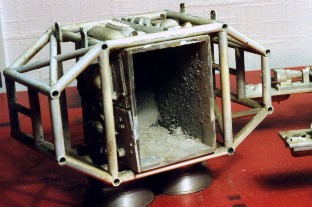
Inside the near 30 year remains of moondust from John Koenigs many crash landings. The central core is 3mm Perspex with one half having an internal lip so the two halves slot together. In order to get the walkways out I had to carefully remove the plastic kit dressing from the top and bottom panels. This detail was changed between the two seasons of Space: 1999 when the model was given a complete overhaul. Note the connecting passageway to the back of the nosecone isn't to scale with the figures in the cockpit or the passenger pod door. |
|
 |
 |
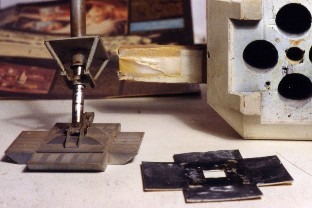
The parts were very
fragile and a number fell apart and had to be glued back
together. All the parts were attached to cardboard with
double-sided tape and labelled so that they could be
reattached in the right places. The parts had been
covered in several layers of paint over the years
trapping dust and creating an old look that I decided to
keep, so I didn't clean them, just resprayed the main box
section and left the side trays alone. |
|
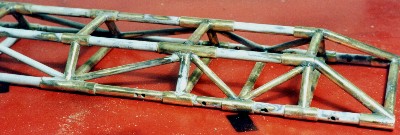
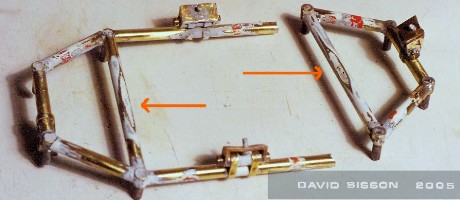
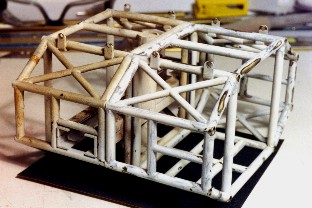
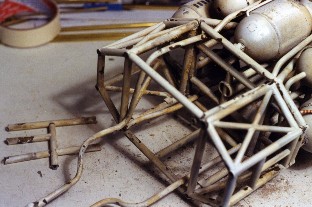
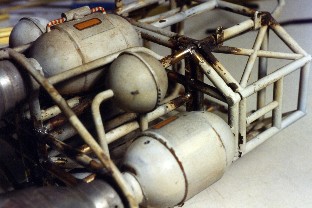
The Spine was not so lucky, with well over a dozen breaks and half a dozen missing parts. All the wider connecting pipes across the bottom were hanging off or gone but the good news was that the spine was straight and wasn't bent at all. The paint on this piece had to be mostly removed to allow for the soldering. |
When it was cleaned up I noticed that a large number of the connecting pipes across the top had been drilled through and had steel-strengthening pins inserted to help hold them in place. This is because the models were often held up on wires during filming, that were secured to the top pipes, and the weight of the model would pull then out. A publicity photograph from 'The Metamorph' shows the Eagles in the volcano and Eagle 1 has two missing pipes at the rear end of the spine; which is possibly the reason why they switched to using the second 44" model during the episode. |
 |
 |
 |
 |
 |
 |
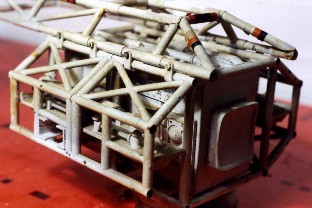
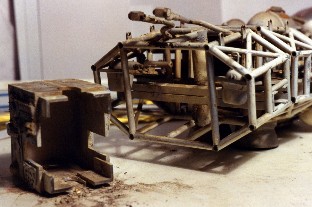
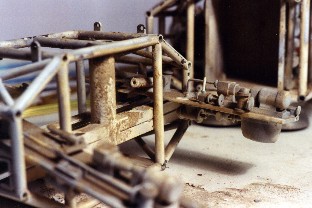
The rear section was
a mess and to make matters worse it didn't want to come
apart like the front section. Part of the problem was
more plastic kit part detailing, a number of which
connect from the two side trays to the central core. The
second problem was that the engine section, which was
removable in Season One, had been fixed to the cage
during improvement work for Season Two. Also two pipes
that supplied gas to the engines run and bend their way
through the pipework to end at a point in the spine. |
 |
 |
 |
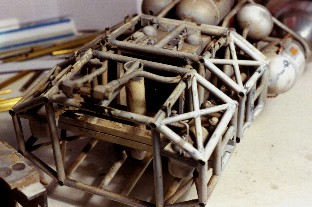
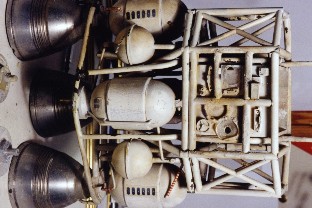
When the two vertical boosters were removed the cross pipes along the bottom fell out, although one small pipe fell out between the two series and had never been replaced. After this two of the small fuel tanks fell away and the right hand engine was only being held on by the copper loop. At some point in the past the model had sustained a very heavy blow to the rear end braking a lot of the joints and twisting the structure - even after I finished all my repairs the unit is still a bit crooked. The small connecting blocks on the rear collar do not actually connect to the big combustion tanks but are soldered to pipes that run through to the aluminium engine bells. The tanks, plastic EMA hemispheres and wooden circular blocks, hang loosely on the pipe whilst the bells fix to the pipe ends with small Allen screws. With the framework loosing its shape and coming apart there was no time to waste, only small areas around each joint were cleaned then soldering began before it all collapsed. The burnt mess could be cleaned off later. Below left; the small missing pipe was not replaced as I considered it to be a minor unique feature on this particular model. |
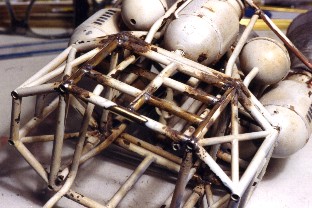 |
 |
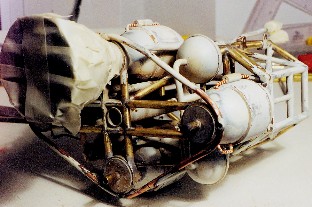 |
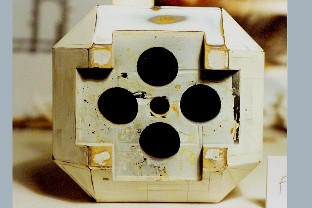
With all the parts now secure I could clean it up and prepare it for painting. One of the engine bells could not be removed during this time as its small gas supply tube wasn't broken. Its the Copper ring (yes Copper not Brass this time - and a smaller diameter than the rest) that loops around the engine unit that actually supplies the gas - and four small bent tubes branch out of this and go into holes drilled in the sides of the engine bells. Yes I have tried attaching airbrush gas bottles to the inlets but nothing happens. A lot more pressure is required to get the four engines to work and I believe that a Nitrogen gas cylinder was used for this effect on the show. |
 |
 |
 |
 |
 |
 |
 |
 |
 |
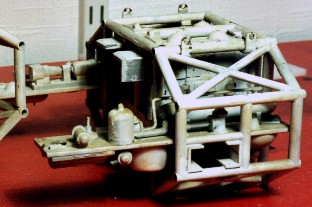
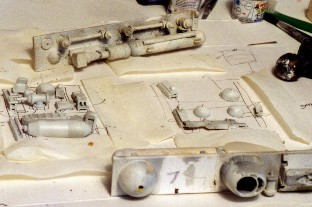
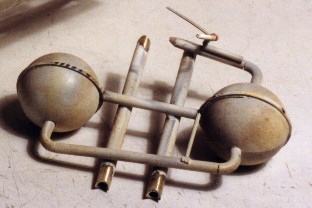
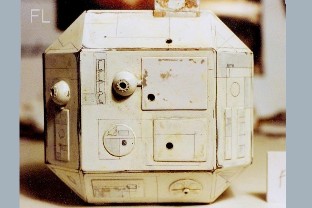
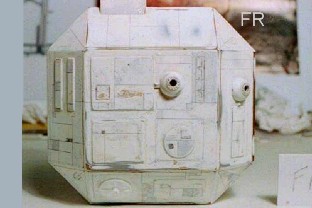
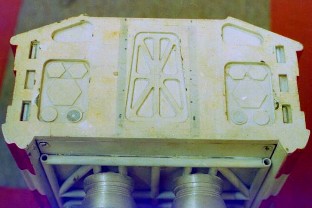
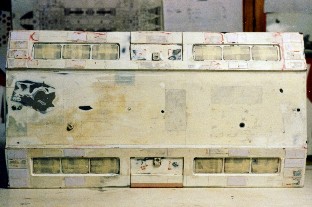
The four shoulder pods had minor physical damage but a number of the surface panels were coming off and had to be reattached. The pods comprise of a wooden core covered in thin Perspex sheets. The attachment arm, that plugs into a slot in the brass framework, is also just a wooden piece and on the front left pod the arm has been trimmed slightly, possibly for when it was fitted to Eagle 2 in the episode 'The Exiles'. As a result it now has masking tape wrapped around it to help it fit back into its proper place but it's still loose, as are the rest to different degrees, and care has to be taken when holding the model that the four pods don't just slide out and smash on the floor. The pods were given a gentle clean with very fine wet & dry paper to remove the outer rougher layers of paint and dirt. The model had around nine layers of paint on it, one of which wasn't very stable and seemed to consist of a greasy dirt. My intention here was not to remove all the paint but just get a good surface to apply the new paint to and in the process uncover the original details that had been lost 20+ years ago. The front left shoulder
pod has three holes drilled in it, one is for the
Grab-Arm locating point but I have no idea what the other
two were for? The front right has numerous burn marks
over the front and top which might explain why it had
been swapped to the rear position. |
 |
 |
 |
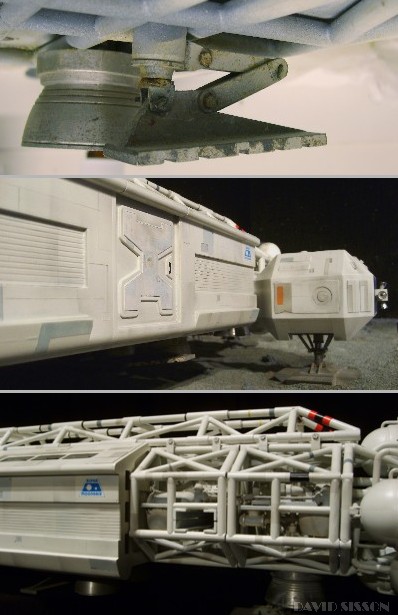
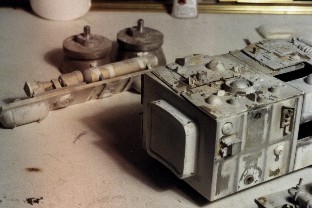
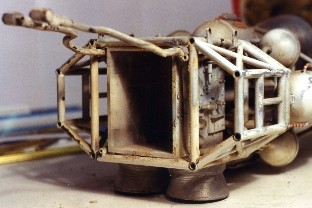
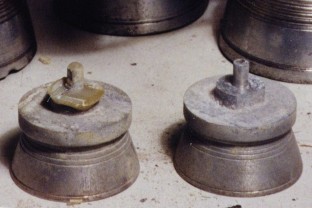
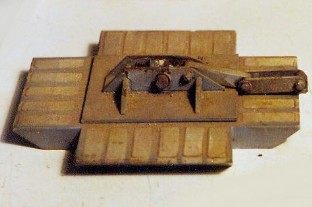
The four undercarriage assemblies are self contained units that simply push into holes in the bottom of the pods and can be easily pulled out - as required for all those crashlanding scenes. These pieces were not repainted or altered in any way. Note the footpads are solid Perspex (2nd season) and not the 1973 original versions that were thinner and made from mulitiple layers of Plasticard. Also the original feet were painted White to begin with, which then became dirty White and finally what most people consider to be normal - light Grey. The small aluminium attitude thrusters were lightly glued into Perspex blocks which have brass tubes protruding from the rear - the purpose of which is unclear, possibly to allow the units to swivel or feed freon gas through to make them appear to work. Not something that was ever done in the series. |
 |
 |
 |
 |
 |
 |
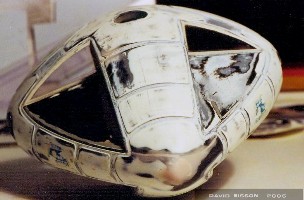
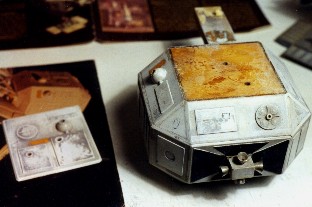
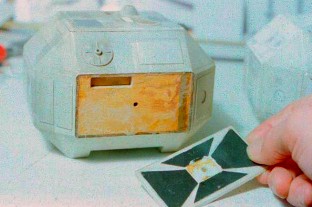
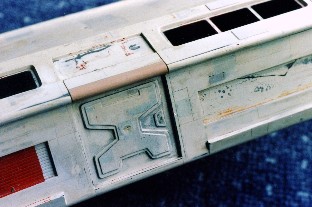
The Passenger Pod
looked to be in very bad condition, however most of the
damage was actually lumps chipped out of the many layers
of paint; most of which simply disappeared when it was
all rubbed down with wet & dry paper. The process was
made easier by removing some kit parts and the thin
Plasticard rectangular panels around the windows -
luckily these were only glued on with a rubbery contact
adhesive and they came away with little resistance.
Various original paint details were uncovered, including
this 1st Season Alpha decal (above middle), that were
carefully masked off so that they could be incorporated
into the final paint finish. One bit of damage that had
to be fixed was the missing section above the door,
although the hole in the door (filled with modelling
clay) was left untouched. |
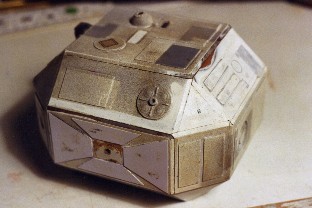
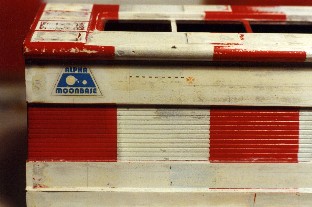
Whilst the legs of the Passenger Pod were seen in the extended down position during the series this is not a working feature on the models and would require some additional parts. The pipes on the bottom of this pod (and most others) are brass but later pods also featured steel or plastic piping. The construction of these pods is mostly Perspex and Plasticard sheeting with the bottom side edges being wood.. Right; the finished pod now displaying the original decal and door panel detail. Many of the panels on the original model are light blue not grey. Grey panels were added later possibly because the blue didn't register on film as easily. Also the pod had red (Rescue) bands painted onto one side during season one and these were then overpainted with the normal white finish, however the darker colour could still be seen so the grey panels helped to disguise this problem. Coloured bands on the frame are either Letraset and electrical tapes or painted detail. New Alpha decals and replacement Letraset rubdown transfers were supplied by Chris Trice.. .The model still shows a lot of the scars from the last thirty years and there are areas that are still unrepairable (without resorting to total replacement) but this just adds to the interest when viewing. Overall the model is in good condition and should have a long life ahead of it. |
|
 |
| All photographs by David Sisson |